Saturday, July 3, 2010

Cold Season Stamps in Hot Weather


Cool off your Summer Days with A-MUSE-A-PALOOZA

 
It is time to think Halloween and Christmas! No, this isn't a joke... if you're a crafter. Crafters are usually months ahead of the game when it comes to holidays. By July, most crafters are finished up with preparations for summer weddings and birthdays and have moved on to the next occasion. In the same vein July is when the majority of stamp and paper-crafting companies introduce their fall and winter line-up so we're all prepared for fall and winter holidays.


At The Paperie this means it is time for A-Muse-A-Palooza! What fun! It's a paper crafting celebration that takes place throughout a full week which features the newest and most anticipated products from A Muse. This is The Paperie's second year participating in the exclusive unveiling event.


There will be lots of chances to participate in the Card Classes and Make 'n Takes. Registration for all classes and Make 'n Takes will be accepted on a first come-first served basis as space is limited so be sure to sign up in advance! A Make 'n Take is a convenient opportunity to make and item with materials provided, and then you get to take it home.

The celebrations begin with the A Muse holiday stamp debut on Saturday, July 10 at 9am. You can be one of the first stampers in North America to own the newest A Muse Holiday and Halloween stamps from the 2010 collection. There will also be mini muffins and complimentary Starbucks coffee.


This year The Paperie even has their own official A Muse instructor, Meghan Fahey!(The cards featured here are some of her wonderful creations) Last October Chris and Janna, owners of The Paperie, sent Meghan to Seattle for official instructor training and she was accepted into the A Muse creative team as a Certified A Muse Artstamps Instructor.


All week long, there will be an A-Muse-A-Palooza Raffle. Customers will receive one raffle ticket for each A Muse stamp you purchase. On Saturday, there will be a draw for the Grand Prize, which is an A Muse goodie bag valued at $50! Create an A Muse card using at least one stamp from the new Holiday releases and you enter to win a $50 gift certificate to spend on A Muse product! Drop off your entry to the store or upload it to The Paperie's Facebook Fan Page before July 16 at 11:55pm. A random winner will be chosen on July 17 at 4:30pm.


For a full schedule of events contact The Paperie at726-5323 or go to http://thepaperie.wordpress.com

For additional on-line content go to http://www.just2crafty.blogspot.com.

Thursday, June 24, 2010

Happy to Me!


My son turns 26 and two cards!

"Happy to me!" was my son's greeting the morning of his birthday for many years. Of course, now he is past the quarter century mark and much more grown up. Memories of that phrase and the wonderful happy smile that accompanied it still bring a smile to my face though. 


I made two special cards for my boy this year.

The first is the one from Clarence, my brother in law. Of course, it is coloured with Copic Markers! It has become my new addiction and there is a stack of coloured panels in my desk drawer just waiting to become cards
.

The stamp is from High Hopes. I just love this little boy, called Sunday's Best - he looks so impish! The paper is Basic Grey as are the lines of paper ribbon in the corners. It was the first time I had used paper ribbon and I really liked the ease of use.

The sentiment is from the A Muse clear stamp set "Mainly Men." 

That is the set I used from my card for Joshua. I also used Basic Grey DP as well as the paper ribbon on for this card. I used the paper piecing technique for tie and the coffee cup to match with the background and give a bit of continuity to the card. The briefcase, laptop and shirt and tie are all on pop dots as is the "Son" in the centre which is actually on double layered pop dots to raise it a little higher. It is difficult to see though in the picture!


Hope you like the cards!

Wednesday, June 2, 2010

My First Card with Copic Markers!

Copics are definitely addictive!

I starting coloring with my Copic Markers and I just can't put them down! I have so many images ready for cards I don't know where to start!
Well, at first I didnt' know where to start!
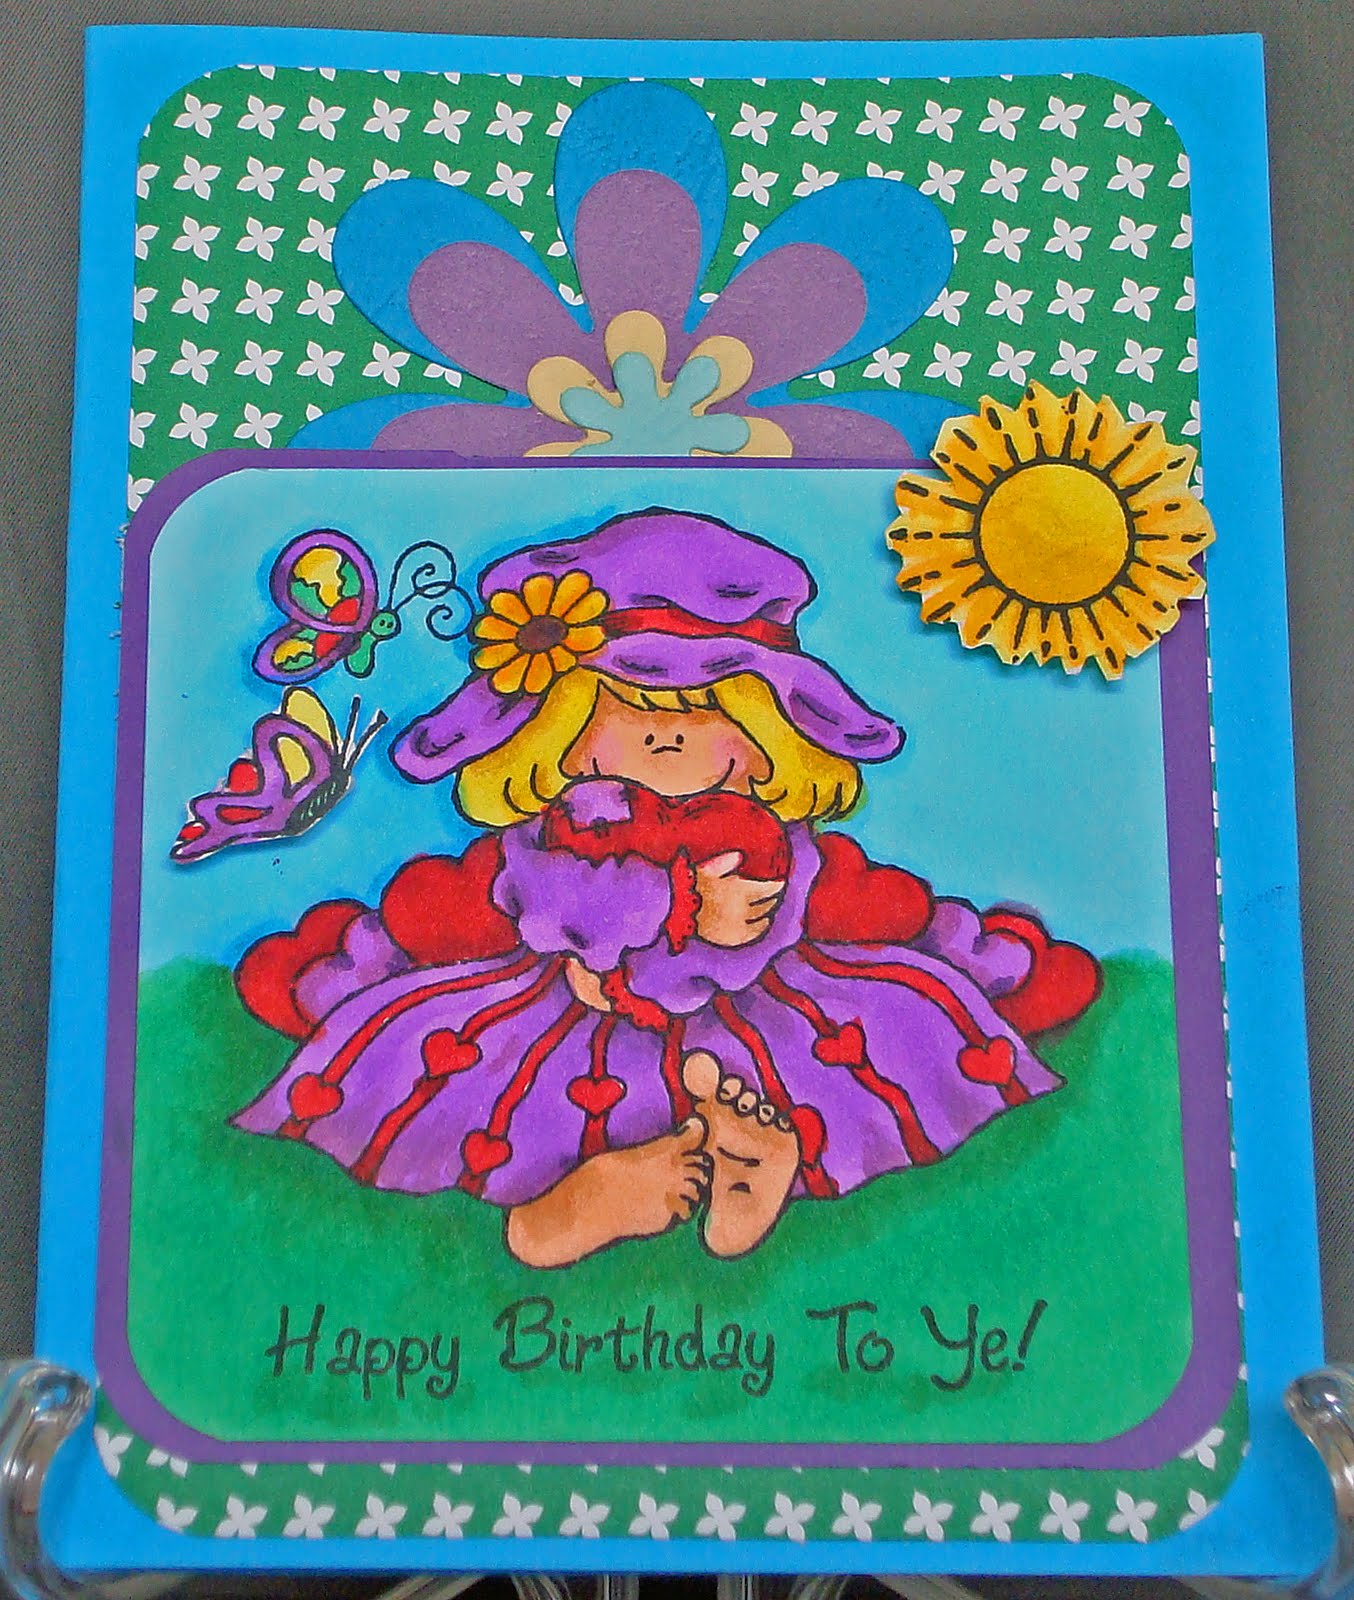
So...Here is my first Copic colored image! I am in love with my markers.  The ease of applications is amazing and the blending is such fun! I have found out that I need to round out my colors a bit more, mainly to add some brown or earth tones.  I knew the minute I touched the tip to the paper that they were worth the money.  the colors are uniformed and vibrant.  They blend well and the colorless blender is just a miracle worker! Great when I color outside the lines...which of course I never do!
The stamp is from High Hopes which I bought at Scrappin' Great Deals.
The layout I used was last weeks CPS challenge.  The first one I have ever done and must say I am very happy that I did!  
As usual the Paper is from the Paper Company all but the card stock that the image is on, that is white Bazzill card stock which was recommended to me by Meghan at The Paperie as the best paper to use for Copic markers.  Thanks Meghan! Once again you were so right!
The sun and the lower butterfly were stamped separately and added to the card with pop dots. I was very tempted to add a bow but didn't want to take away from the main image.

So, how do you think I did with my first attempt at coloring with Copic Markers?

Monday, May 31, 2010

I Have to Bragg!!!

I Finally Have Some Copic Markers!!!

Ok, I have wanted these ever since they first appeared on cards at SplitCoast Stampers!

I always had problems budgeting such an indulgance in our household budget. So last year when I started writing for Current Magazine I had the thought of my Copics in the back of my mind. The payments I make with Current goes to me. . . and I must admit...mostly to stamping supplies with the occasional dinner out thrown in for good measure.

Yesterday I finally did it! I went and got my Copic Sketch Markers. I am so happy that The Paperie is carrying them now!

The funny thing is, I figured that I would come right home and start coloring! But I am hesitant...I think I wanted them for so long that now I am half afraid that I won't be able to do them justice! Silly hay?!?

Most of last night was spent on You Tube watching every Copic tutorial I could find! So now I will give it a go! Hopefully you will see my first Copic Marker creation here tomorrow!

Wedding Congratulations

RSVP Addition

My son Josh is standing at one of his best friends weddings in July. He had to send back the RSVP and wanted to include a card of congratulations for it. He brought me the card and the envelope so I could make one to fit the card. I also went a step further and matched the card to the RSVP card. I didn't include a picture of the RSVP card though as it has her name and info on it and I didn't think that would be quite right!

I used the Sketch Challenge from Splitcoast Stampers for the layout, and stuck with black and white as those were the colors of the RSVP card. The main panel is a cuttlebug embossing folder; textile. It is mounted on a black photo mat that I took from a random wedding mat pad. I like the texture of it and thought it would go well with the embossing. The cross piece is made of the same paper. The salutation comes from my Best Wishes and Blooms set by Unity Stamp Company.
As finishing touches. I added rows of pearls to the top, centre and bottom and then to the flowers on the cuttlebug panel. The ribbon and bow are the final touch to the outside.
The inside liner is embossed with the same design and a ribbon added to unify the card. The pearls and stamps were both bought at The Paperie.

Always Good To Be The Baby Of the Family!

Happy 61st Donna!

My oldest sister, Donna turned 61 on May 29th! Now when one of my siblings has a birthday, it's a happy day for me, because I am the baby of the family and will always be the youngest!
I look at it as redemption for all the younger years when I was "too young to come too" or "too young to understand" or heard the all to common "Do we have to take her, Mom?!?"

Here is the card that I made for Donna. I actually got to participate in Splitcoast Stampers Monday Technique Challenge for last week with this card. Their challenge was to create a card using the black magic technique. You can find a tutorial for the technique here. In the Video you will notice that she uses water colour pencils.
I actually used my Stampin' Up's Water Color Wonder Crayons - Bold Brights. First I stamped and heat embossed the images using white embossing powder. Then I applied several coats of white paint to the design and let that dry over night, once that was dry I applied the colored layers. The layers are punched with an ek success slim boarder punch. The stamps are the Best Wishes and Blooms set from the Unity Stamp Company . Both of these items were purchased at The Paperie. To finish off the card I embossed the sentiment and added some ribbon as well as another flower that I cut out after I painted it and popped it up with dimensionals.
The inside is done with an insert I cut with my Cricut and added a matching ribbon to tie the whole design together.
Donna was thrilled with the card and actually is planning to bring it home and frame it! Now is that a compliment or what

Saturday, May 29, 2010

Add a Personal Touch to Your Wedding

Handmade Invitations and Accessories

By Debby Winters

Spring and summer are the seasons of white taffeta dresses, wedding veils, bouquets and fruitcake covered in fondant!

If you are one of the many brides to be that are planning your very own memorable walk down the aisle, then you are probably in the throes of confused organization as you pull all the integral parts together to create that magical day.

One way to give your wedding a very personal touch is to create your own wedding invitations and wedding favours. It has become a very popular pre-plannng event for the bride and her party to get together and make these all-important components.

Drawing upon books, magazines, the internet, local scrapbooking and card making stores or clubs can all work as resources and inspiration.

You can book the workshop workspace at The Paperie's for your event where you and your team will have access to their tools such as the AccuCut as well as the staff's expertise to help guide you with your creations.

Once you have an idea then you can go about gathering the necessary supplies. You will need cardstock, envelopes, adhesives and any embellishments you may wish to incorporate. You can hand stamp your invitations and accessories or you can print them from a computer. It is advised that you always start with making one invitation first. You may find that you actually make several samples before you decide on the final design that you want to go with. Another thing to keep in mind is the size of the invitation and if you can buy ready made envelopes to fit them.

Meghan from The Paperie created the beautiful invitation set shown. They are very elegant yet clean and uncomplicated to allow for ease of production.

The invitation enclosure was created with an AccuCut template in The Paperie's workshop. The invitation measures 5" x 7" and the RSVP is a 3.5" x 5" card.

The band around the invitation imprinted with the bride and grooms name and wedding date adds a beautiful and sophisticated personal touch.

Other personal touches you may wish to make would be the menus, place cards, table numbers and favour boxes. The favour box shown is also made with an AccuCut template and compliments the flower blossoms on the invitations and other materials.

For that final personal touch you can make your wedding programs and thank you cards. The church programs are made with the same print as the invitations but mounted on brown card stock with an added ribbon. All card stock used is from Bazzill and is available at The Paperie.


If making your own invitations feels like much too daunting a task, you can also have your invitations made for you by the experts at The Paperie and you will be able to maintain creative control.

For more information visit http://www.thepaperie.ca or call The Paperie at 726-5323. For additional content visit http://www.just2crafty.blogspot.com.

Writer's note: Special thanks to Meghan at The Paperie....not only did she make all these beautiful items, she also took the great pictrues!